Team Projects
Create New Project
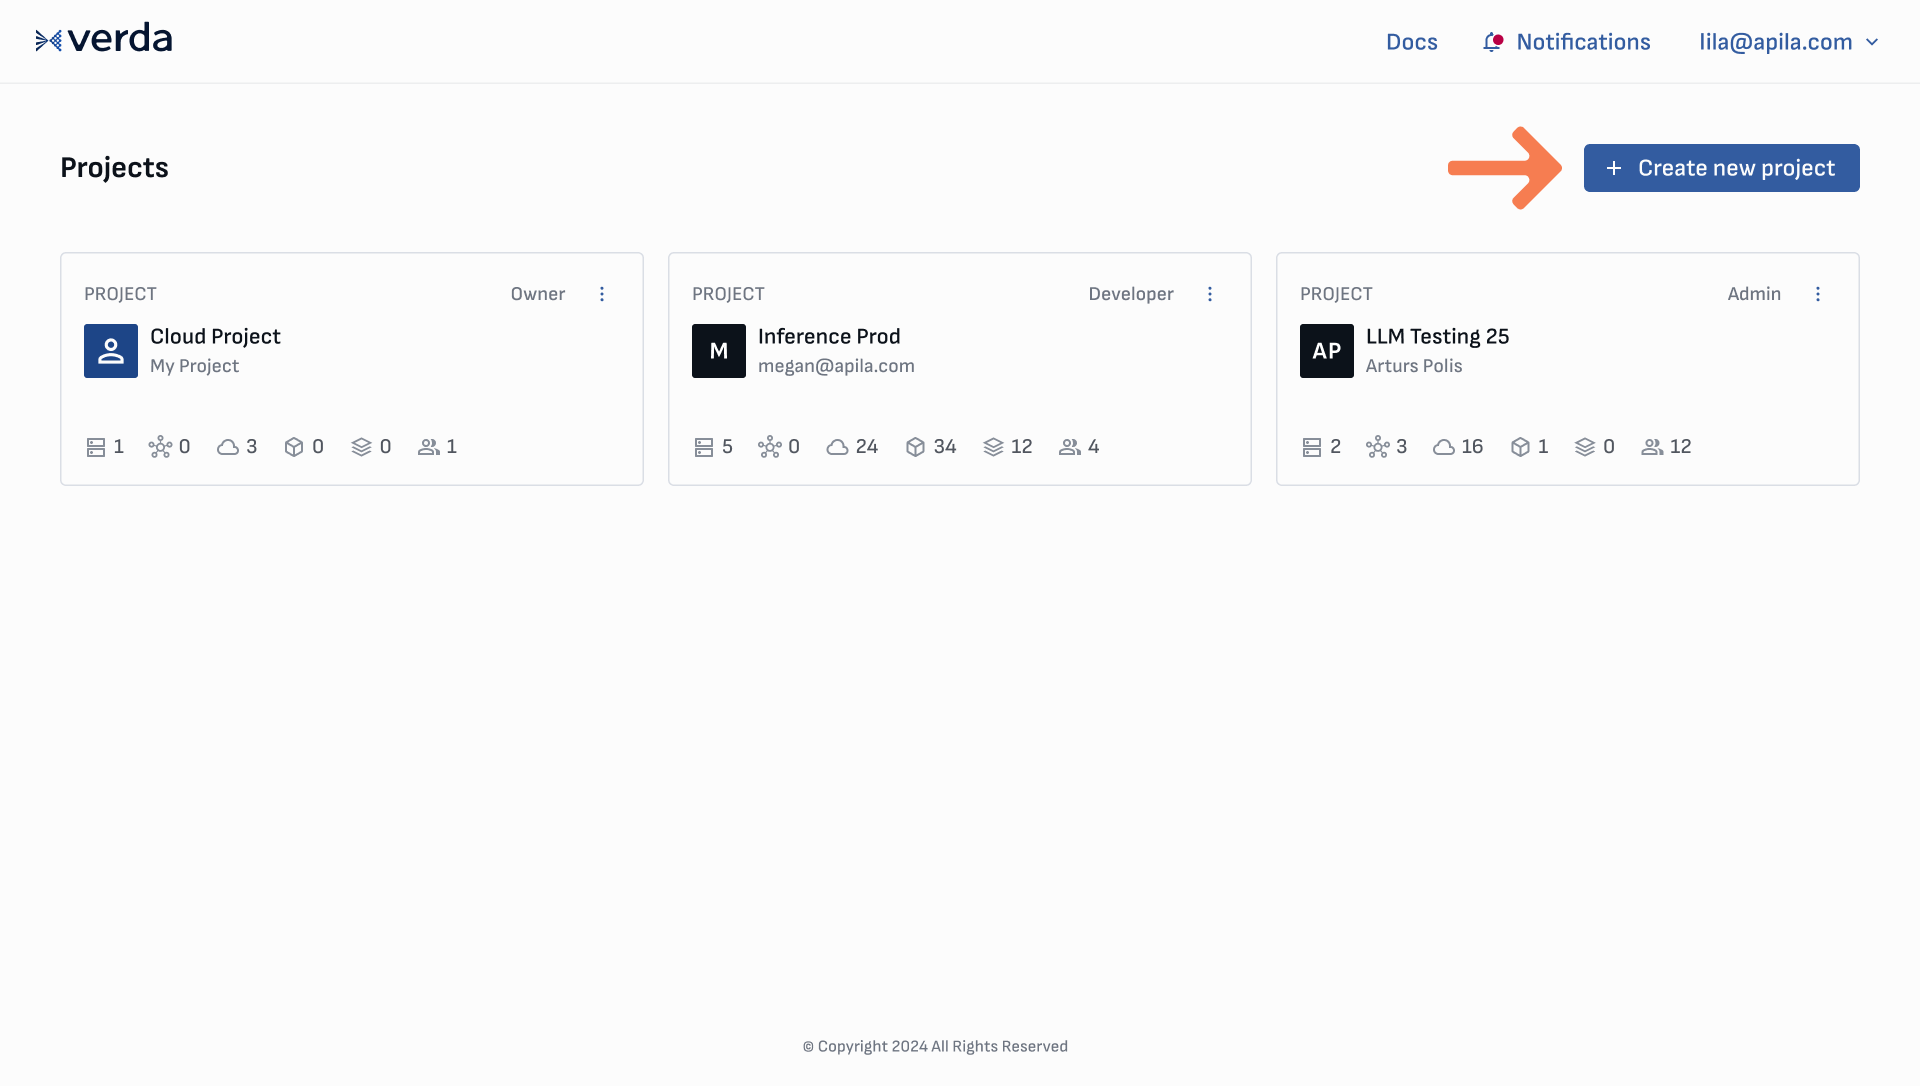
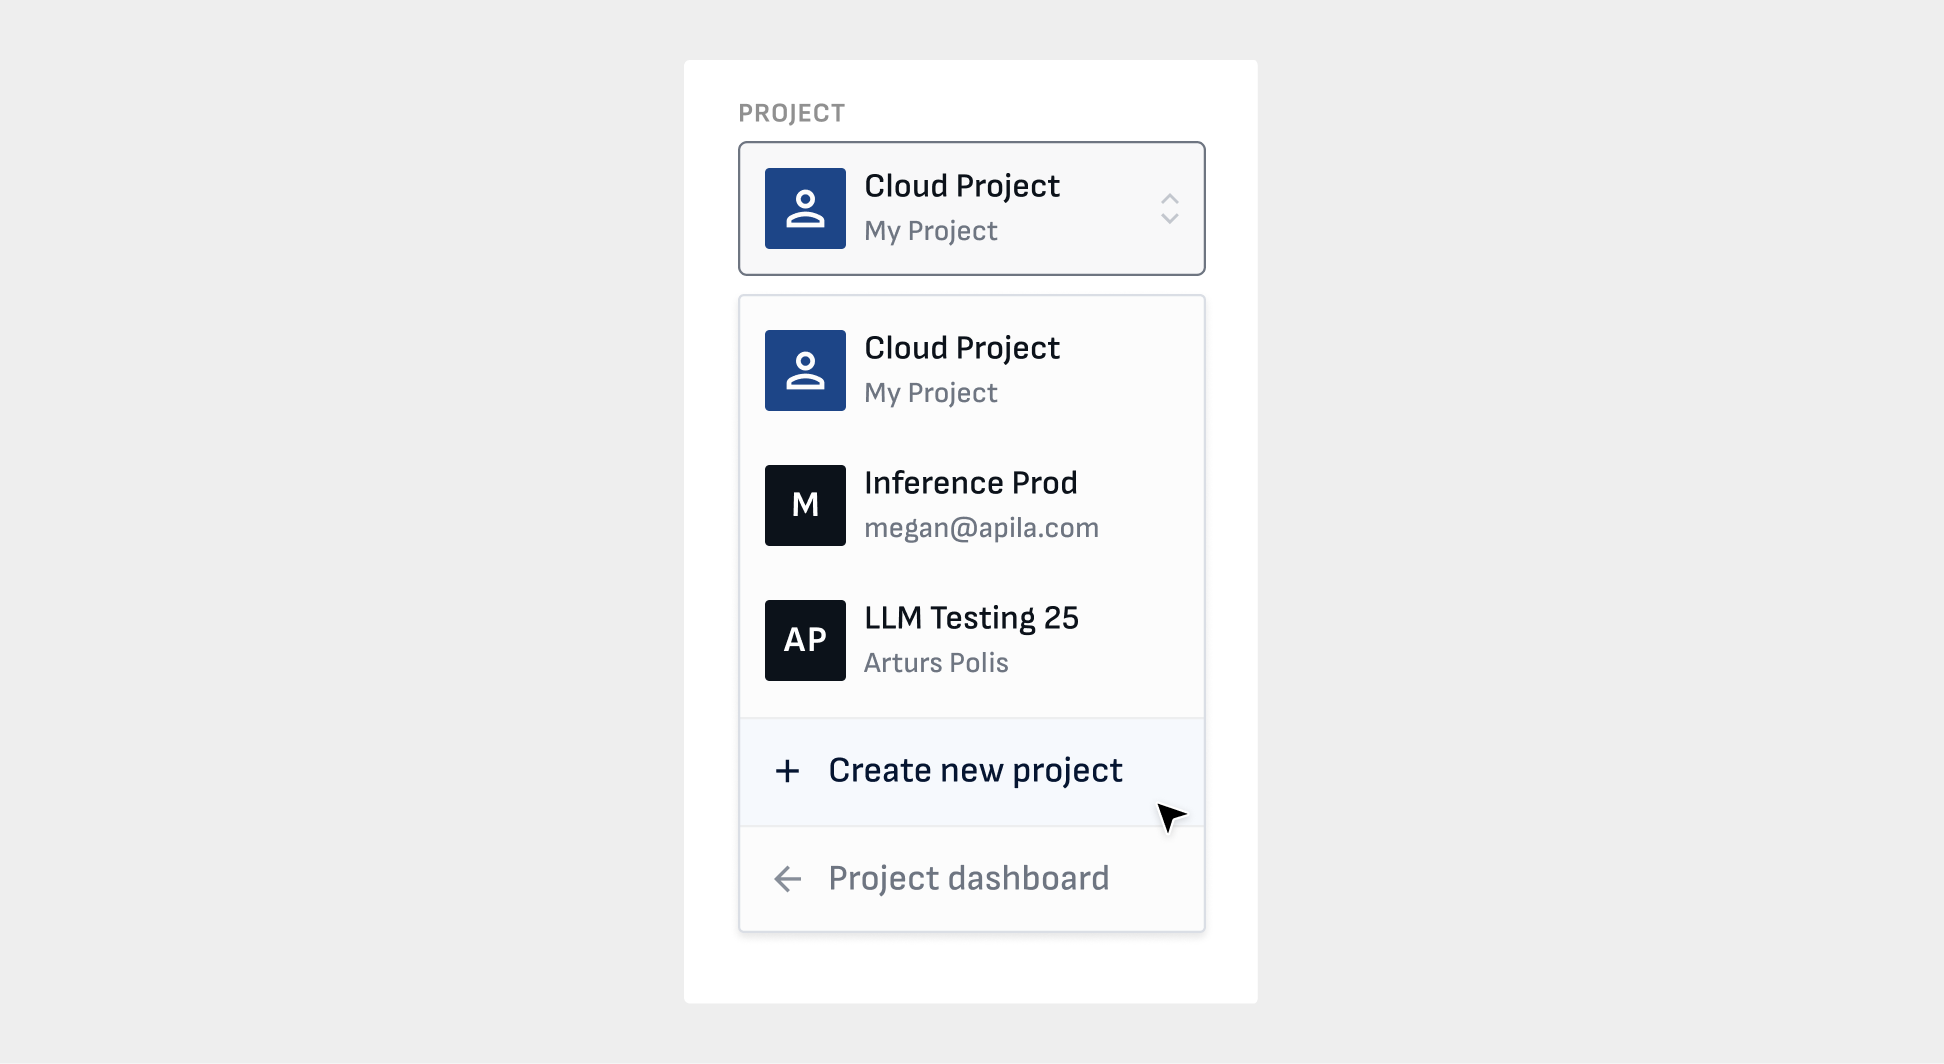
There are two different ways to create a new cloud project: via the Project dashboard or the Project menu.
Create a new project from the Project dashboard by clicking the Create new project button on the top right corner of the screen.
You can also use the Project menu found within the navigation sidebar by opening the drop down menu and clicking Create new project option.
Input the project name and any email addresses of team members you would like to invite, and click Create project. (See more about inviting team members).
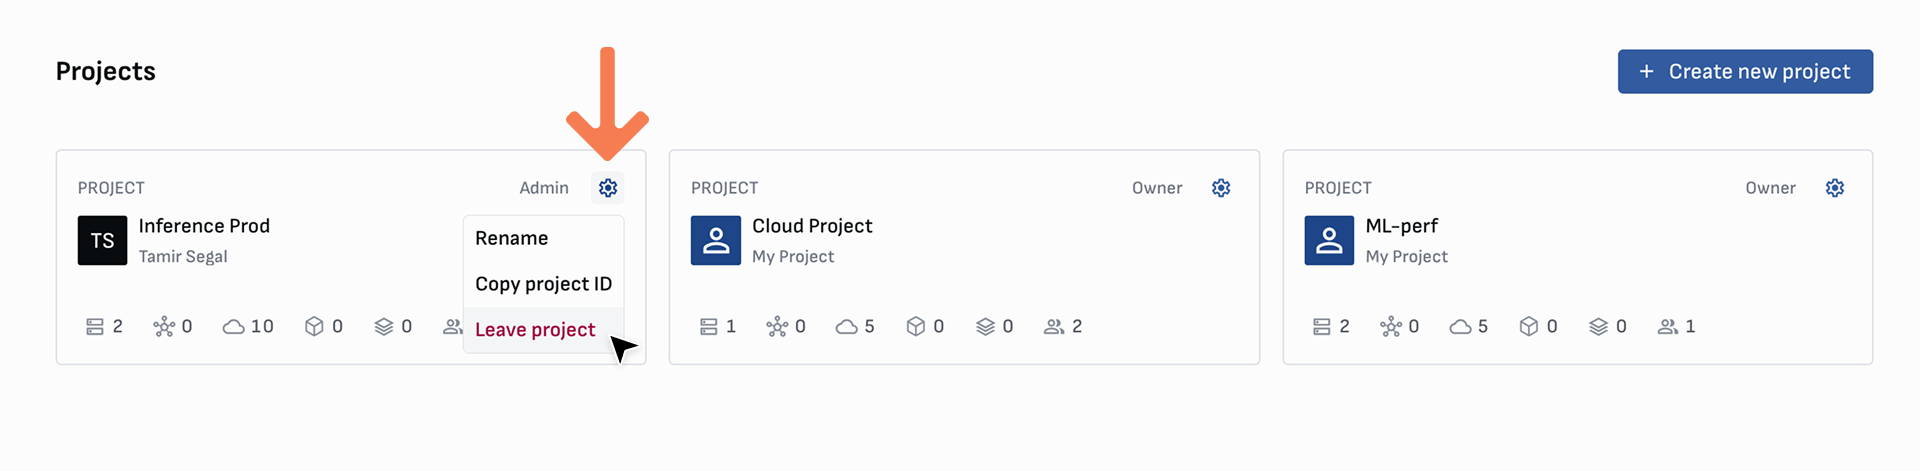
Delete a project
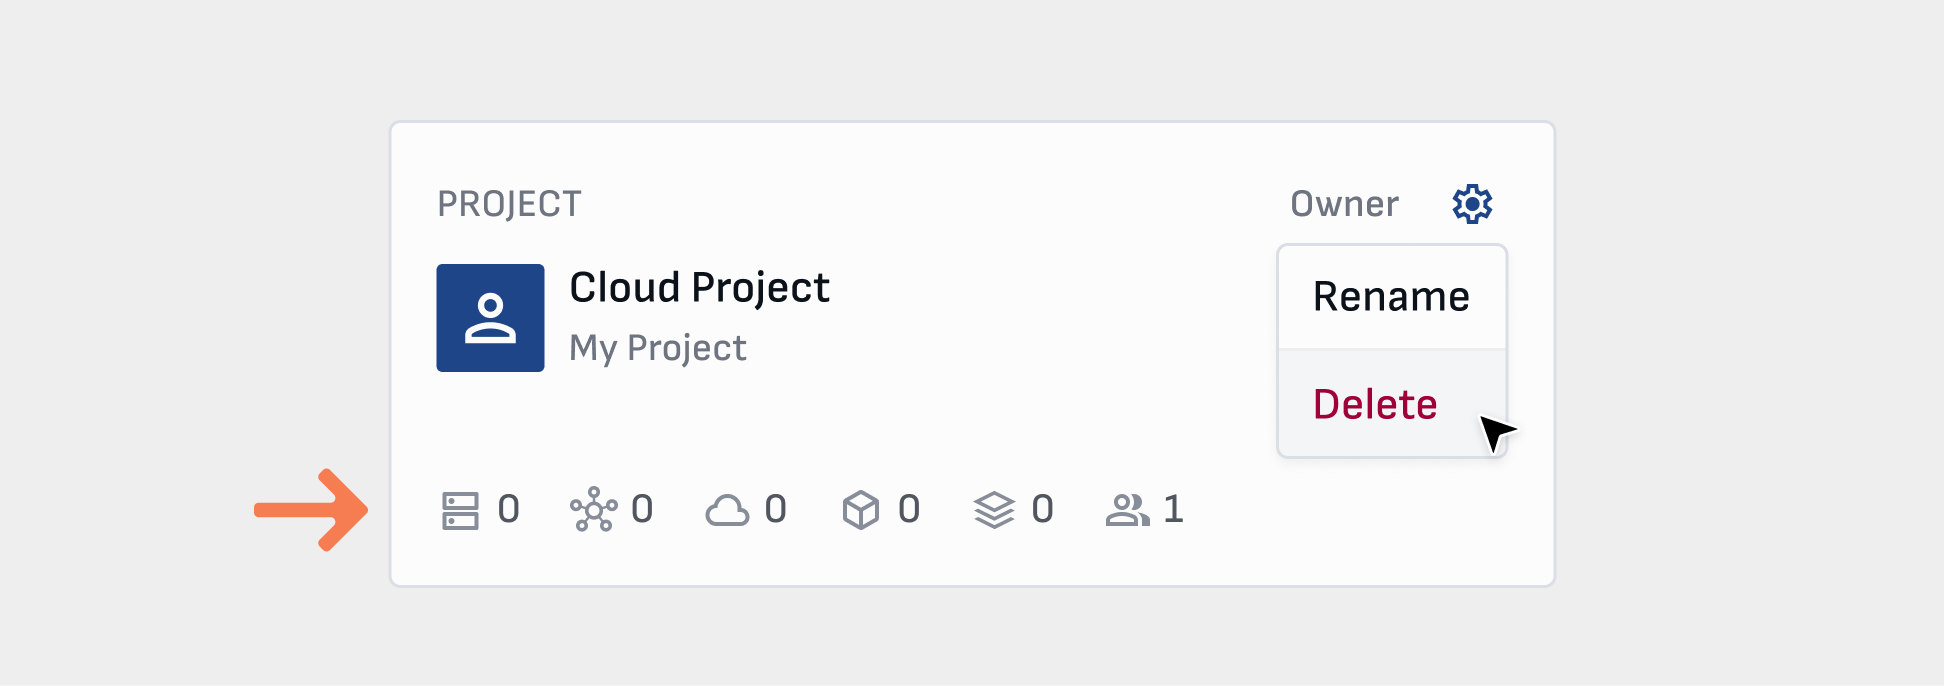
You can delete any project of which you are the Owner. On the project dashboard, open the settings menu on the project card and click Delete.
Any remaining balance within that project will be sent to your Unallocated funds in My Account page, see Transfer Funds.
Warning
You must delete or transfer all instances and volumes from a project to enable deletion.
Project billing
Project payment methods and billing information (including address, company name, and business ID) are always associated with the Owner of the project.
Billing information can only be edited by the project owner in their My Account page. Project admin can view this billing information in the Billing & Settings page.
Payment methods are added by the project owner. Both owner and admin can view the payment methods and choose which ones to use for topping up the account, including automatic top-up.
Project developers can create and manage resources, but do not have access to view or edit billing and payment details.
Transfer funds
When a project is deleted, any remaining funds from that project will be transferred to your Unallocated balance in the My Account page.
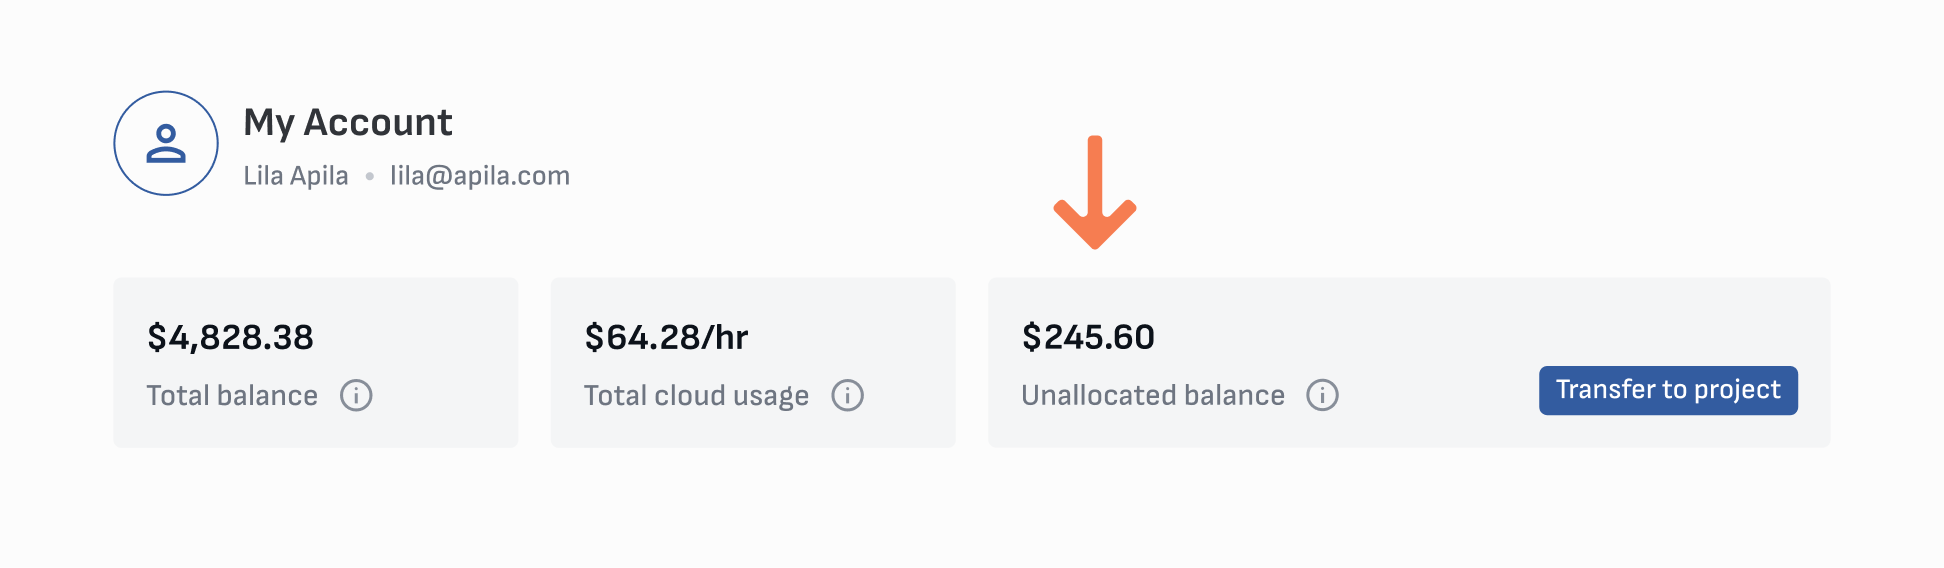
From the Unallocated balance, funds can be transferred to any other project you own.
![]()
Info
You must be the Owner of a project to transfer funds into it.
Transfer resources
You can transfer active compute and storage between projects. In order to transfer resources, you must be the Owner of both the source and target projects.
Info
When transferring Pay As You Go resources, the target project must have enough balance to cover at least 30 minutes of the transferred resources.
Transfer compute between projects
You can find Transfer to new project in the Actions menu on the compute cards or in their specific pages. Compute can remain running during the transfer. There is no need to shutdown instances, unless you want to detach storage first.
![]()
Choose which project the instance will be transferred to and click Transfer compute. All attached block volumes will be transferred with the instance.
Transfer block volumes between projects
Info
Volumes must be detached before individual transfer is enabled. OS Volumes can only be detached by deleting the instance for which they are used as the main OS.
On the Block volumes screen, open the settings menu of the volume you would like to transfer. Click on Transfer, select the target project, and click Transfer volume.
![]()
Transfer shared filesystems between projects
Currently, you cannot transfer shared filesystems between projects as they may be shared to other compute. We are working hard on improving this feature.
Feel free to reach out to us for assistance via the chat on the console or email [email protected].
Invite team members
Invite team members from the Team page. Click the invite button on the top right of the screen.
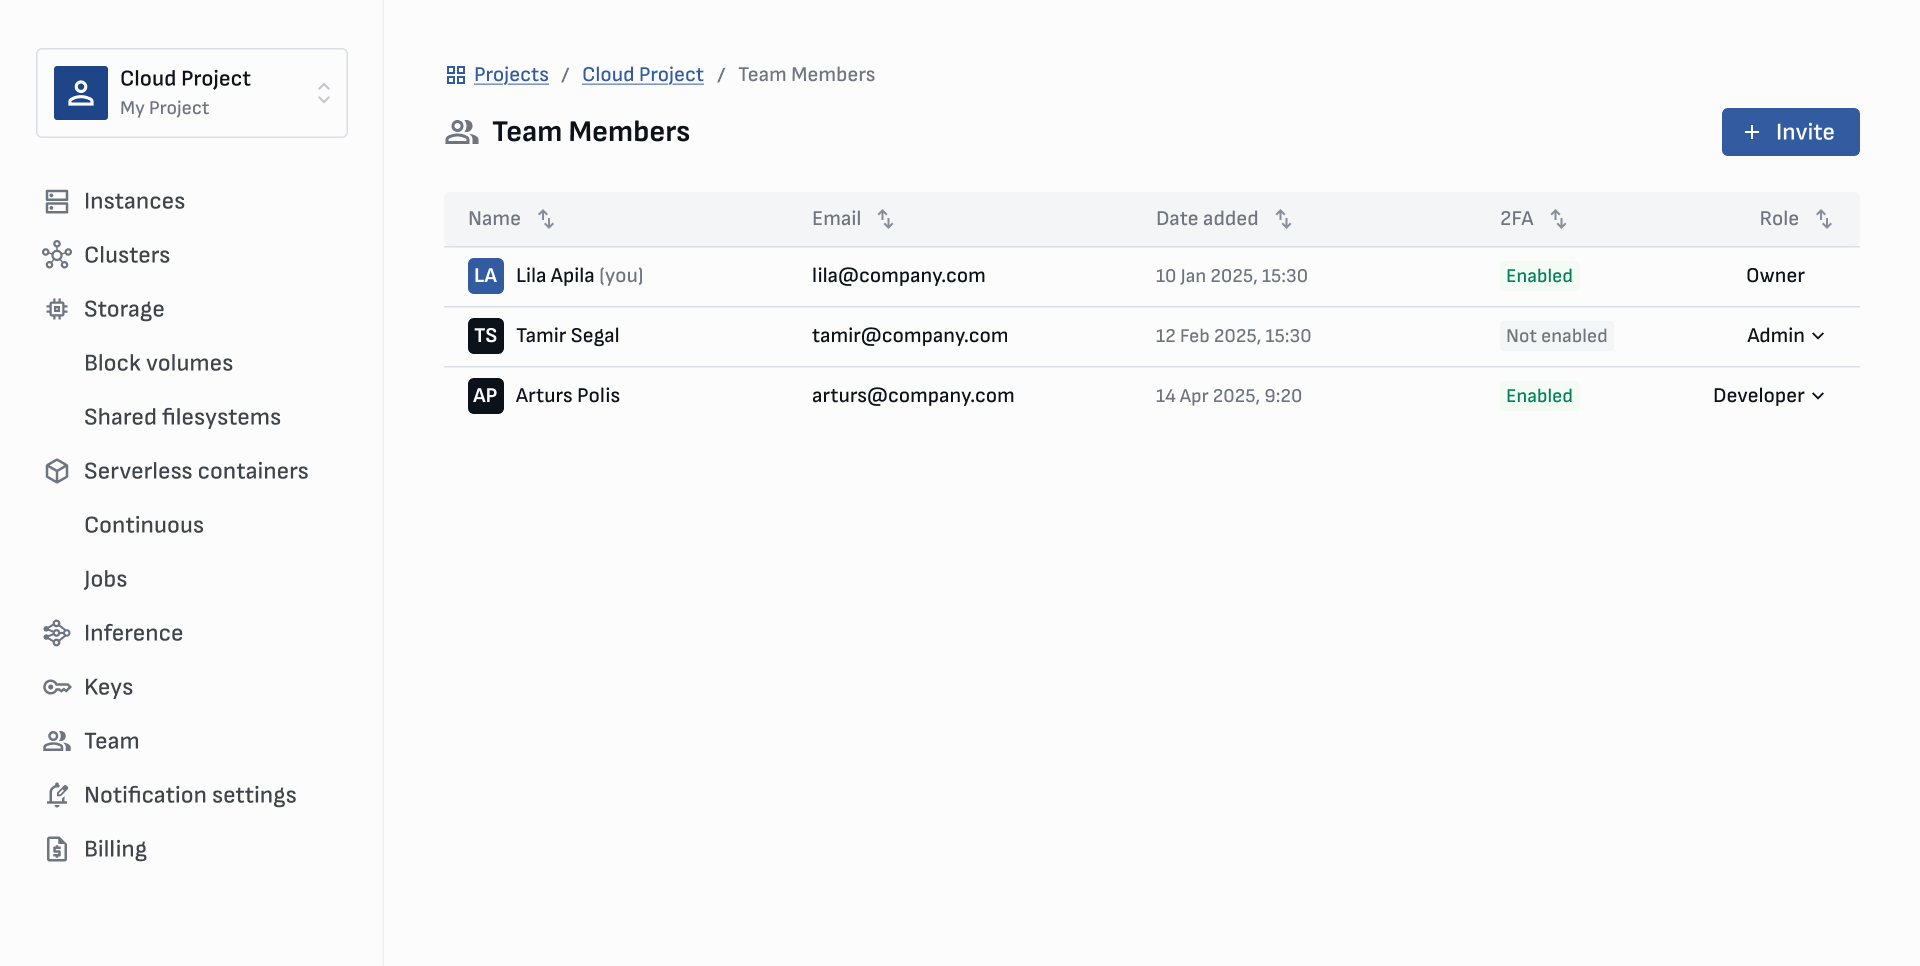
Input email addresses of the team members you would like to add. Choose a role for them using the menu. View role permissions below.
They will receive an email invitation with a link to accept and join the project. You will see when they have accepted the invitation next to their information on the Team page.
Roles
Team members are given different roles with various permissions:
- Owner is the user that created a project. Owners have all permissions.
- Admin have almost all permissions, except editing projects or editing billing information.
- Developer can only deploy instances, create volumes, and manage project resources.
Role Permissions
| Project Permissions | Owner | Admin | Developer |
|---|---|---|---|
| Deploy and manage instances | ✅ | ✅ | ✅ |
| Create and manage volumes | ✅ | ✅ | ✅ |
| View auto top-up settings | ✅ | ✅ | ✅ |
| View balance, currency, usage rate, remaining time | ✅ | ✅ | ✅ |
| Edit auto top-up settings | ✅ | ✅ | ❌ |
| Top-up project balance | ✅ | ✅ | ❌ |
| View billing details (name, address, VAT) | ✅ | ✅ | ❌ |
| Invite team members | ✅ | ✅ | ❌ |
| Change team member roles | ✅ | ✅ | ❌ |
| Transfer resources between projects | ✅ | ✅ | ❌ |
| Rename project | ✅ | ✅ | ❌ |
| Change default payment card | ✅ | ✅ | ❌ |
| Edit billing details | ✅ | ❌ | ❌ |
| Add/delete payment card | ✅ | ❌ | ❌ |
| Transfer funds between projects | ✅ | ❌ | ❌ |
| Delete project | ✅ | ❌ | ❌ |
Changing roles
Project Owner and Admin can change the roles of other team members using the menu in the Team page.
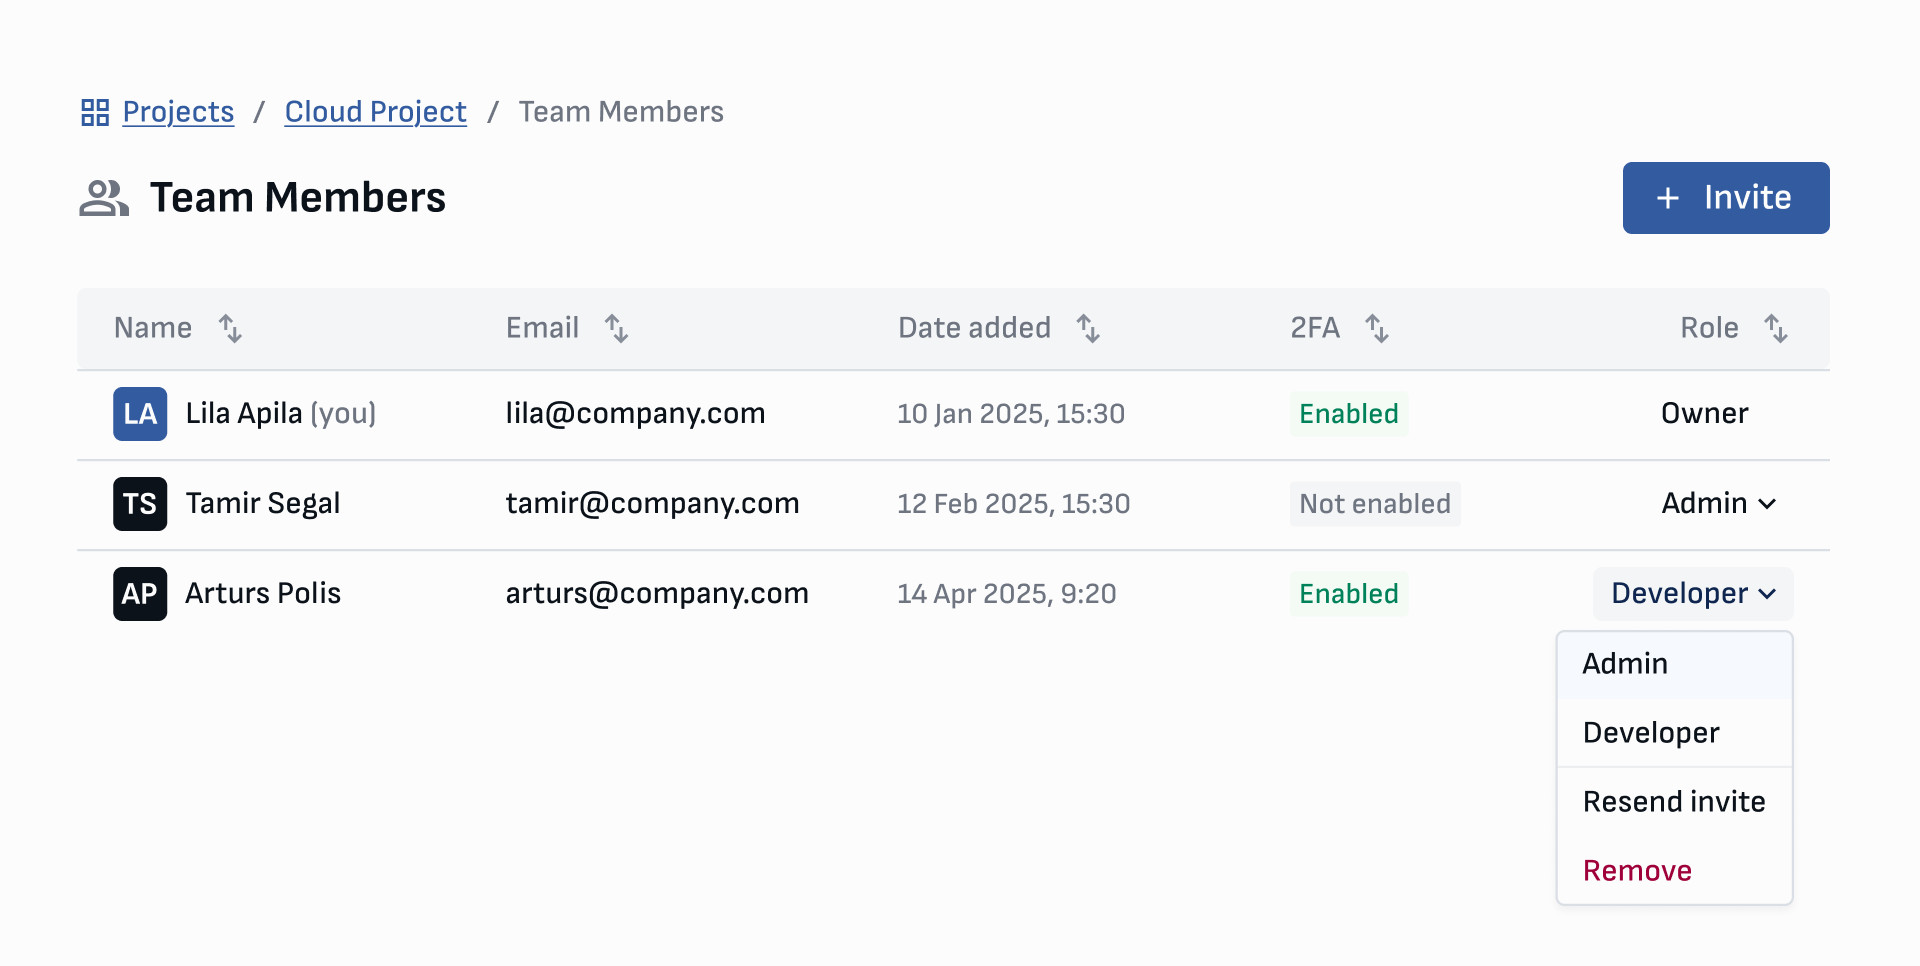
Remove a team member
On the Team page, click on the role menu associated with the team member you would like to remove and click Remove (see image of menu above). You must confirm the removal of the team member.
For security purposes, all Cloud API keys the team member created will be deleted upon their removal. Contact us via chat or email [email protected] if you need assistance.
Leave a project
If you are a team member of a shared project, you can leave a project from your role menu on the Team page (see image above) or from the settings menu on the Project card.
For security purposes, all Cloud API keys you created will be deleted upon leaving. Contact us via chat or email [email protected] if you need assistance.
How to find the Project ID
Your Project ID is essential for troubleshooting, so please have it ready when reaching out to our support team. Project IDs can be found from the URL or copied from the Project card on the Project list screen.
